
There are probably only a dozen of us “olds” who would even get the reference to the “joke” in the title, alas. Above is the +4 as it sits now; mechanically it’s awaiting a distributor and the inlet manifold and carb bodies. As for the rest, well, the work awaits. (The rebuilt master brake cylinder is also leaking, but I’ll see if I think it can be made to not leak. If not, I guess a lesson learned; I’ll consider switching to a dual-circuit master.)
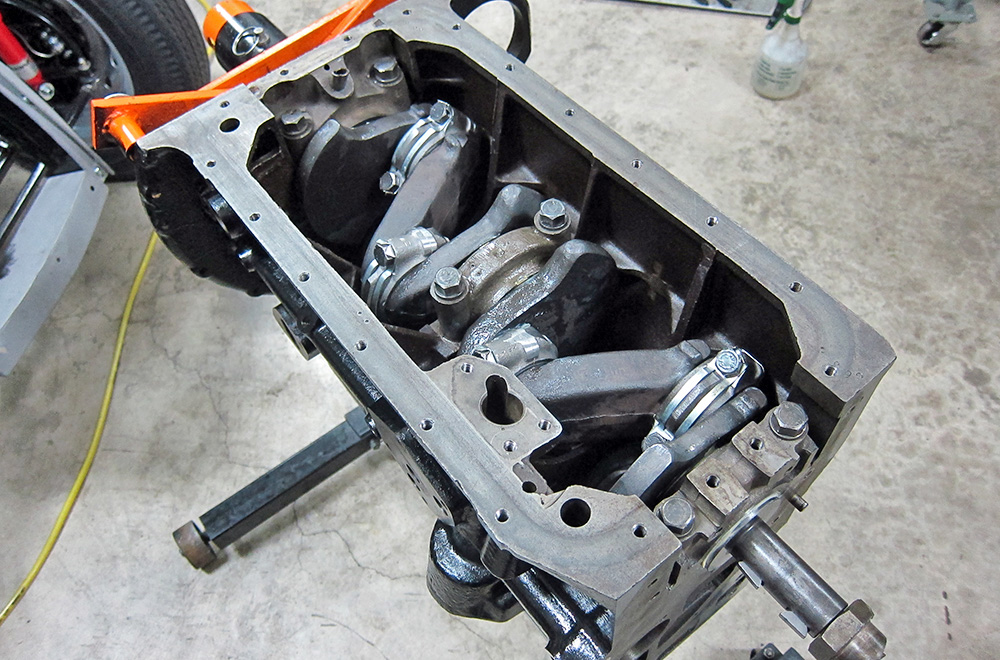
Building the engine was an interesting experience, though not without some minor drama. It was a lot of work cleaning the block out, and even when I was done I don’t think any professional (or internet pretend professional) would consider it clean. I found discussions of people with “white rooms” and surgical caps and anything less than shiny iron a cause of generational shame. It’s just as well I have no descendants.
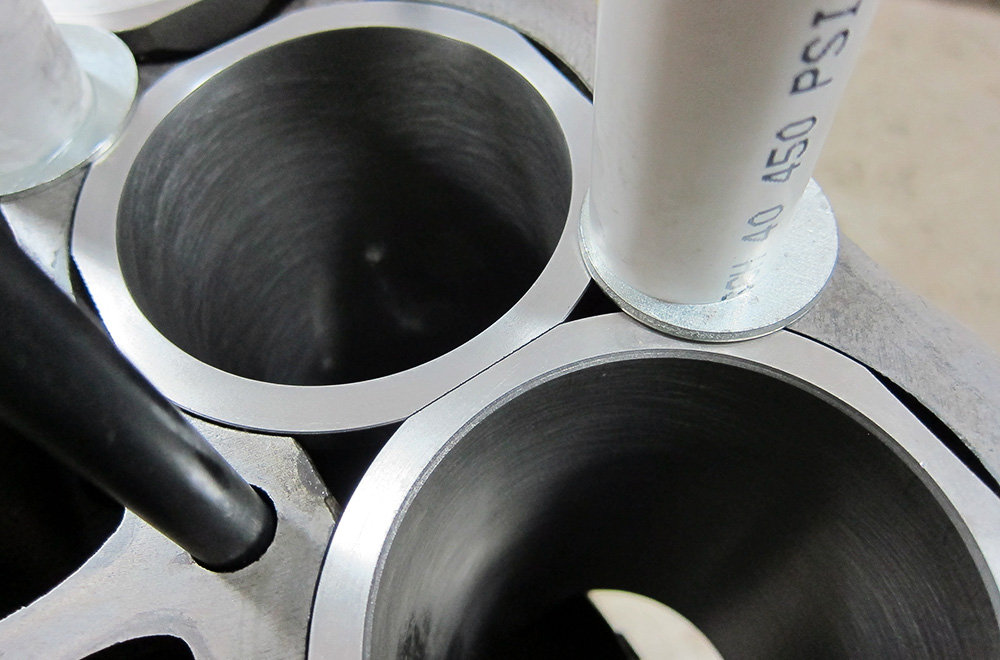
One of the acts in the drama was the discovery, only after it was installed, that liner #3 had no bevel at the top of the bore, pretty much essential for getting the pistons in, at least to this amateur. So I pulled the gasket-glued-to-the-figure-8 liner out and did a free-form bevel by hand in the best tractor-motor tradition. It actually was an OK effort, and it will give some future builder a laugh when they see it. This is pretty typical of parts you get these days, in my experience.
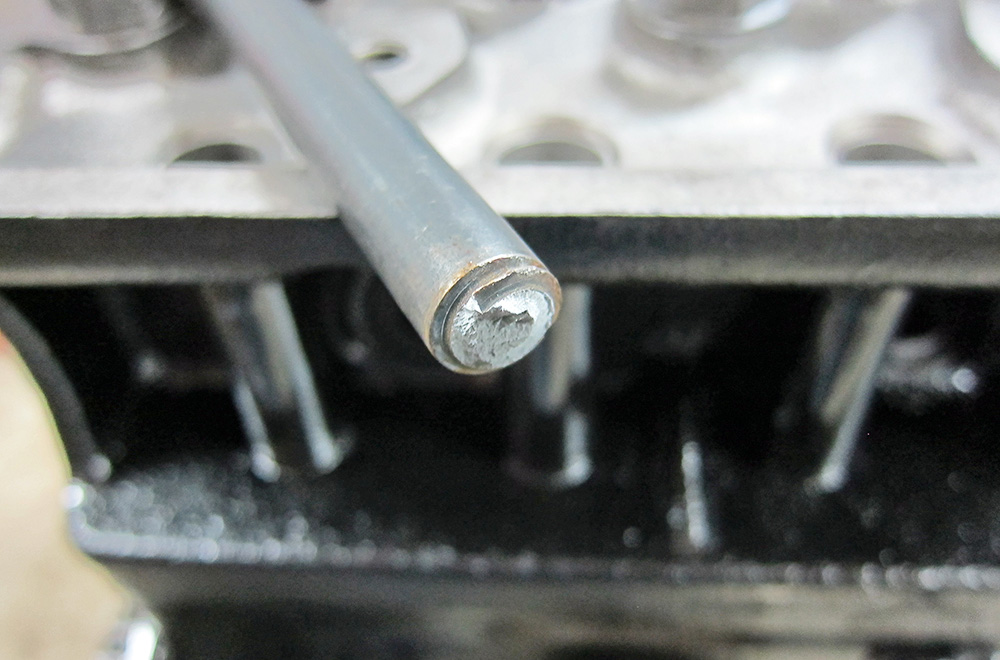
More dramatic and infuriating was the above, a brand-new head stud which broke before reaching the specified torque. I would contend it should be nearly impossible for a middle-aged man to break a 7/16″ diameter piece of steel with hand tools, but there we have it. Of course, it was one of the long studs, and broke at the bottom of the hole. Took me an afternoon to make a tool to retrieve the broken off nub.
I pulled every new stud and re-used all of the originals, despite their vise-grip marks from a previous build–no way was I trusting any of these. Back to BPNW they go (when I get around to it).
The head doesn’t fit particularly well on this motor, from new. It’s slightly cock-eyed, probably 1/32nd of an inch off-square at the front. Car seemed to run OK, for lethal-six-mile-trips-home values of OK, so good enough. Very Morgan, in any case, even if they just bought this bit in.
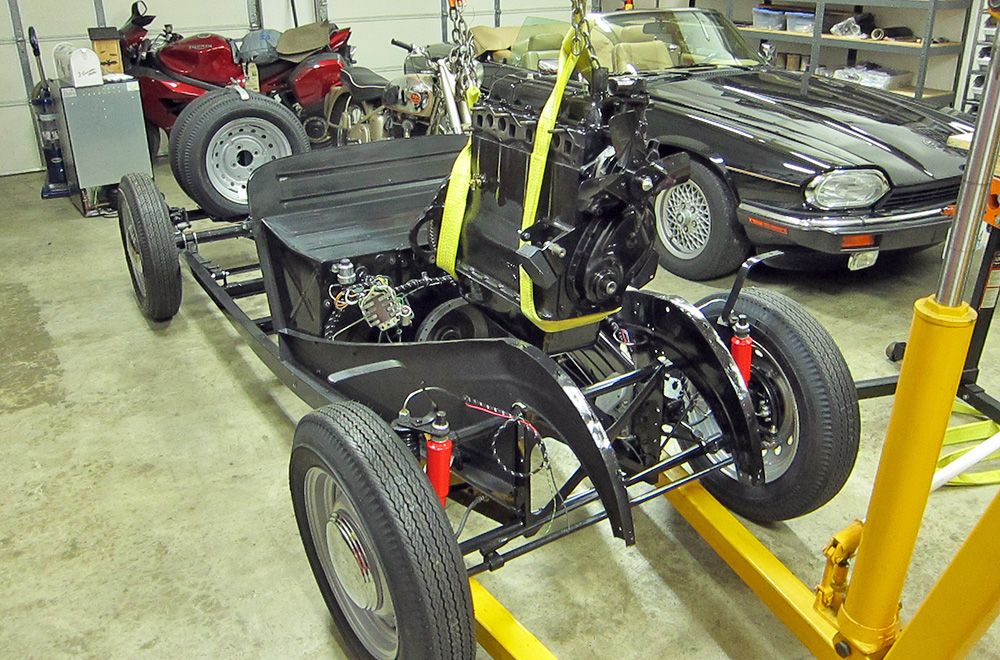
I was just able to squeak the motor in without having to move the transmission/extension assembly from its resting place.

The clearance at one point was measured in microns; the fan and pulley had to come off before it would go home.

Above is the motor in place. Getting the front motor mounts to bolt down was an adventure. I have the firewall top bare in this photo in order to repaint it…again. No polishing this time, I will live with orange peel. It will serve as an honest advertisement for my painting abilities (which is to say “none”).
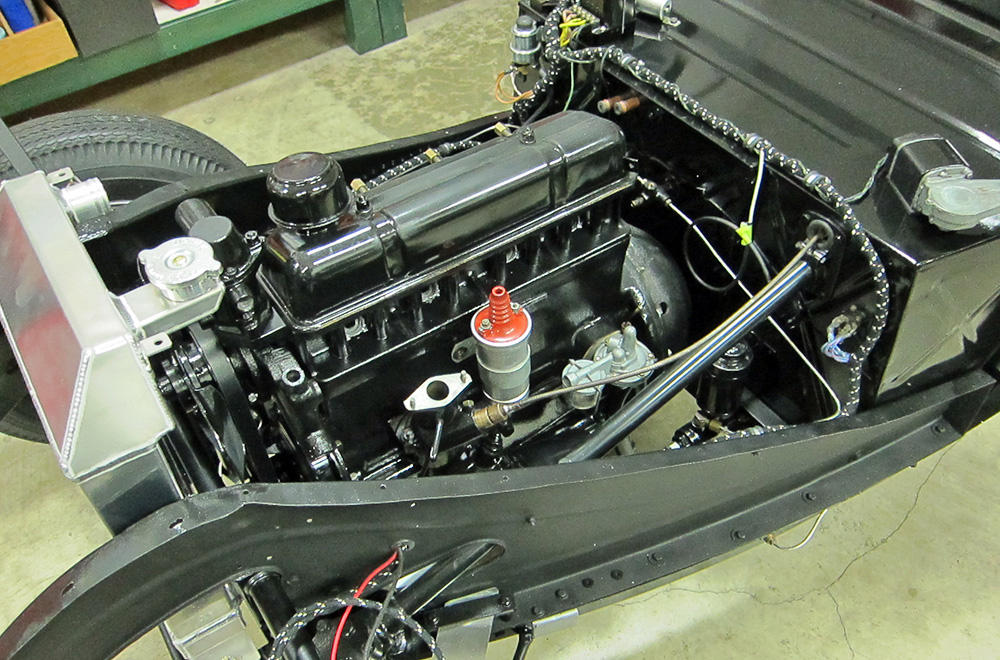
This is the current state. The distributor was from a TR3, so I didn’t have too many qualms about buying a rebuilt unit from British Vacuum Unit back east, which should be here soon. (My advance unit was shot and the points plates were not good, and that’s half the cost right there.) The sport coil is exactly the same age as I am…5/67, so I’m hoping it keeps going. Probably will outlast me!
I rebuilt the generator, a step-case Lucas C40–though it looked to have been rebuilt not long ago (at least miles-wise).
I bought a fuel-pump rebuild kit from Moss Motors, and despite their dire and repeated warnings it probably wouldn’t work in this Canadian-built reproduction of unknown vintage, it seemed to go together OK. I guess the proof will be in the rather flammable and very runny pudding.
The radiator is a shiny and expensive new unit, which I am still trying to decide whether to paint or not. Because the front suspension sub-frame is new and doesn’t allow the re-use of the original brackets, I opted to make my own to pick up some existing holes in the new frame:

I don’t weld, but can rivet like a madman, which should surprise no one.
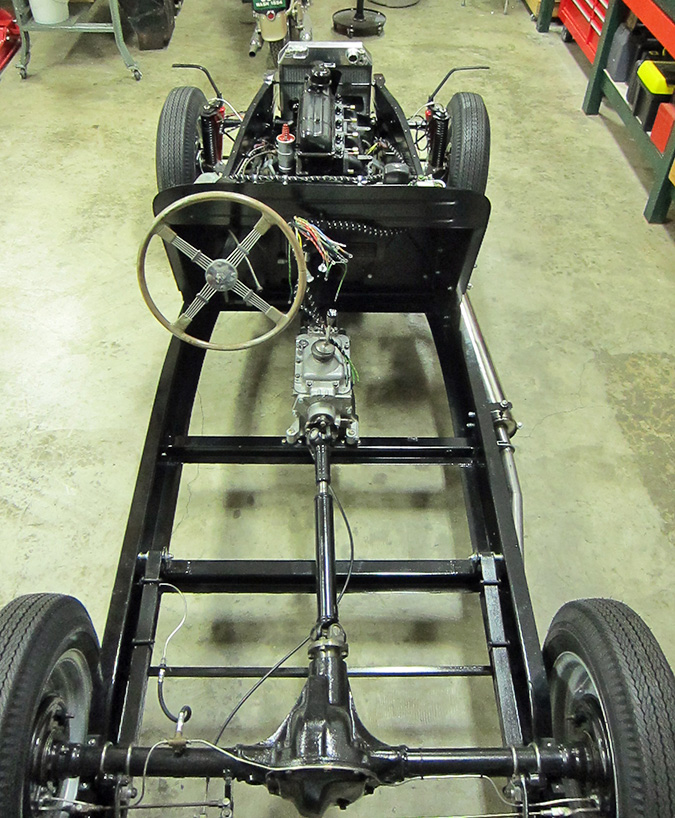
Morgan Motors of New England says this front suspension sub-frame is what you can get from Morgan these days, which is fine; but they call it a “zero camber sub-frame”. There are at least two degrees of positive camber at each wheel; I’d hate to see what they call “positive camber” frames! I am thinking of ditching the new passenger-side front fender mount and having my old one repaired, you can see the shapes are nothing alike.
I have my old steering wheel in for maneuvering purposes; there is a semi-amusing story about that: When in Canada in May (with the XJS at the All British car show), I ran into a gentleman I had bought a number of parts for my E-Type from. He was there as a spectator, but in his hands was a perfect condition marbled Blumels wheel, just like the above. I mean perfect. He had found it on the only table I missed in my early-morning run-though of the small swap meet.
It’s destined for his garage wall! Le sigh.
well done… as always! she’s starting to look like a proper motor…. onward! cheers, J. aka. The Scourge of Nottingham
Wow! Do you do Magnettes?
It’s much easier to install the pistons in the liners on the bench. The liners have a nice chamfer on the bottom. Invert the liner upside down on the bench and push the piston and ring assembly top of the piston first using the rod as handle . Think motorcycle cylinder installation. Nice job Roger!
I’m sure Ms Fairchild would be impressed with your work even though she probably would not understand most of it. I believe the passage of time has likely affected her fenders as well.