John at Autosport Seattle hosted a “tech session” for the local Jaguar club today, featuring the tear-down and examination of an XK engine. The engine chosen was the one from the infamous Rusty Heaps “imaginary car.” So this counts as, gasp, some progress on the E-Type restoration!
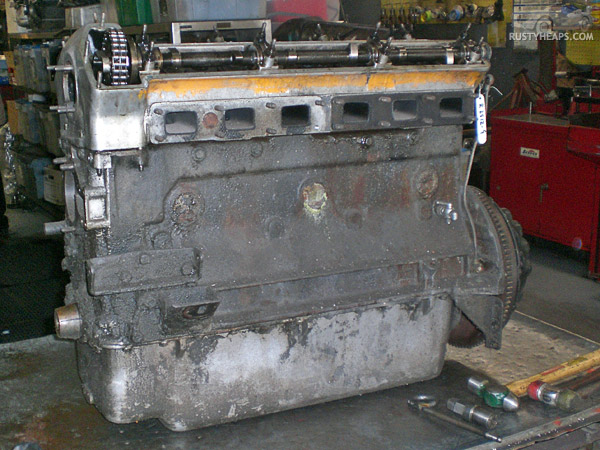
The night before the “show,” John removed the studs from the block and undid the cam sprocket bolts in order to expedite the demo. (I’m embarrassed at how filthy the mill is…your machinist really likes it when you get rid of the heavy grime before bringing them your engine, but I was in a rush when I brought this down…many years ago, now.)
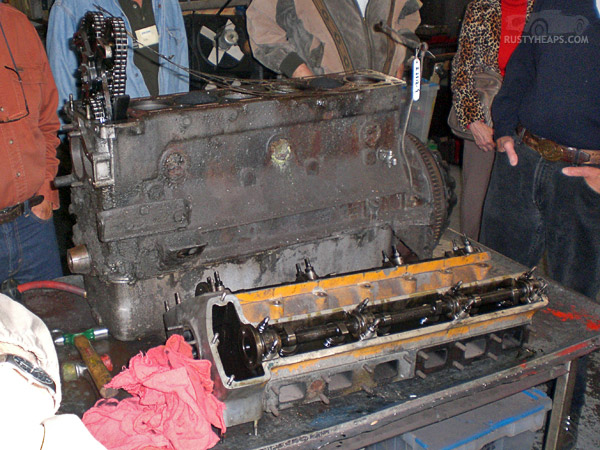
Removing the studs makes taking the head off a doddle. (If you don’t remove them, you can be there for weeks trying to get the bloody thing off!) This engine’s head still had its original shimmed gasket, and there was no sign it had ever been off the engine before.
Removing the sump didn’t reveal any horrors. The oil pump has been changed, though, and the rear seal only had one hex bolt holding it on, while the other fastener was pretty buggered–someone was bodging a bit at some point.
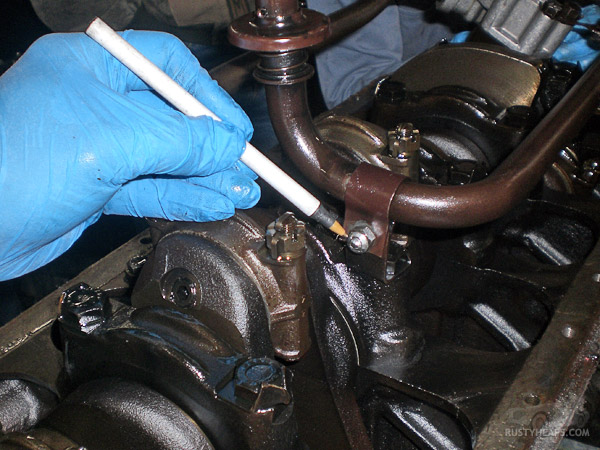
Not sure how far the car drove on the new oil pump, but neither bolt securing the oil-feed pipe was tightened. That’s not good, generally speaking.
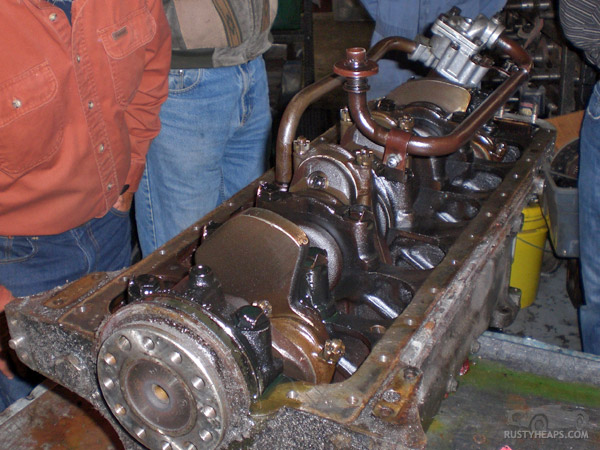
When we removed the main caps, all bearings were found to be in OK condition, with one exception, and even that wasn’t too horrible. All of the journals were worn about .001″.
John does a quick examination of the cylinder bores. None had any discernible wear…if this was going to be a budget-job John thought a hone of the cylinder liners and a re-use of the original pistons would be fine. Because we don’t want to cut corners, we’ll bore out to the next over-size piston (.010 or.020) and use new pistons.
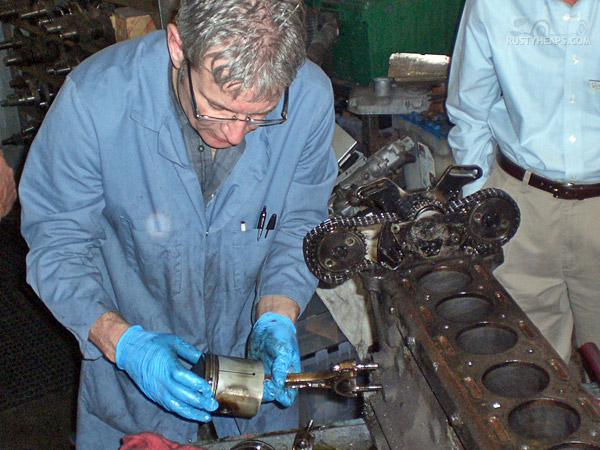
The pistons were in good condition, with no broken rings. (They will be replaced, to match the new bore.)
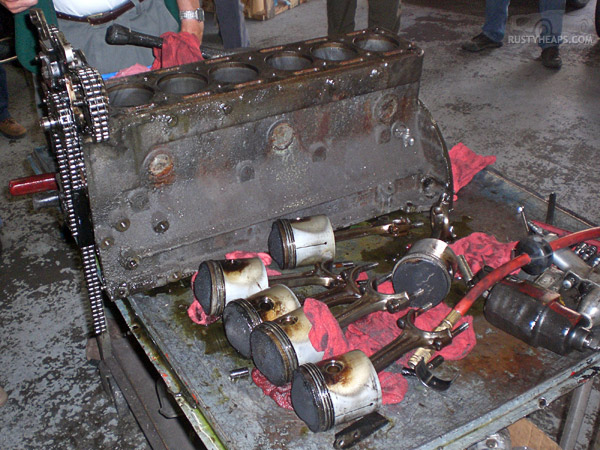
The aftermath of the tech session. Autosport has rebuilt hundreds–possibly thousands–of XK engines, so this hodge-podge is perfectly decipherable to them (and when not pulling things apart quickly for a restive audience, the aftermath is much neater). I advise home-restorers to use more care in keeping track of the parts!
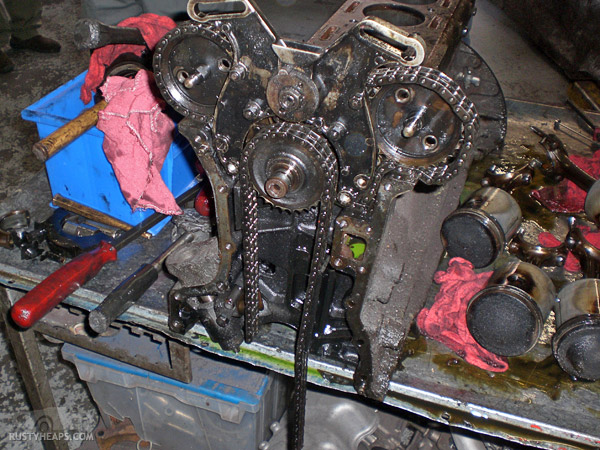
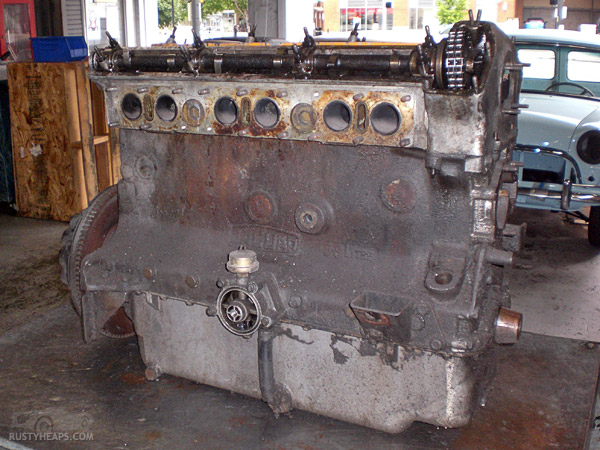
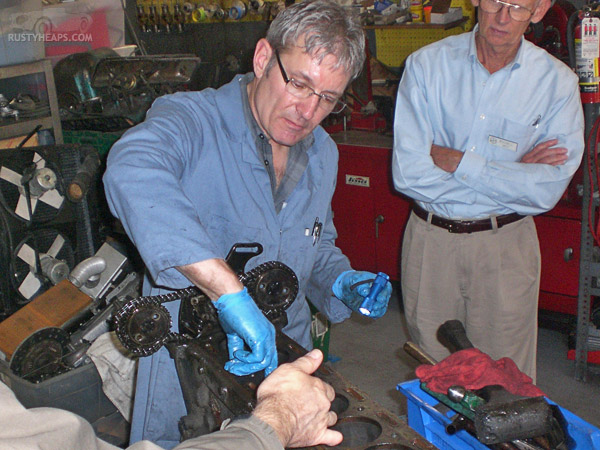
More “wreckage.” The timing gear didn’t want to come off the nose of the crank, so to move things along, John removed a pin from the chain and “broke” it. (The chain will be replaced anyway, of course.) The block was free of cracks or other damage, which is a relief.
I’ll admit to another “raise the eyebrows of the machinist” moment: I neglected to drain the coolant from the block, so when John tipped it over to take the sump off about a million gallons of coolant came pouring out. Oops.
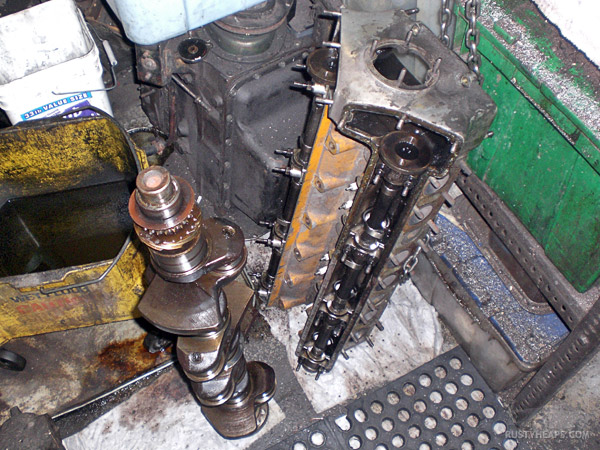
The head will be further disassembled, of course, and the crank looks good.

Nothing to see here except the sump and the timing cover.
In all, I’m very pleased with the condition of the motor. It really couldn’t be better. The ring-gear was missing a couple of teeth, one main bearing was visibly worn, and the rest looks very good. We’ll be going with late fuel-injection valves, stake-down kits, a 4.2-type oil pump and new bits where warranted or needed. But looking good so far! Something on the car had to be better than expected, eh?
It is a shame I missed it! Would have loved to be there cracking wise, but I’m unpacking boxes at our new home in Bend.
I haven’t seen the inside of one of those for 35 years! Now I have the bug again and this helps a lot. Keep up the good work.
I am about to take on this exact project (first time) over the next few weeks. How were the head studs removed?
John uses a modified stud puller, starting with one of these. I think the mod he did allows the puller to easily fit in the tight space around the stud…you can use the “two nut” method, as well.
Do your crank a favor and recycle those heavy old pistons. Get some lighter, modern ones.
Can you tell me the engine number and especially the casting number on the timing cover?
Also what is the serial number of the car?
Steve, the info on the car is here: 876073. I don’t have the parts in front of me at the moment.
So yours is a european delivery coupe? Mine is 885201, the 201st US coupe. My timing cover has a part number of C.8614/1 and wanted to compare notes when you get near it. Thanks-Steve